
Side Dishes
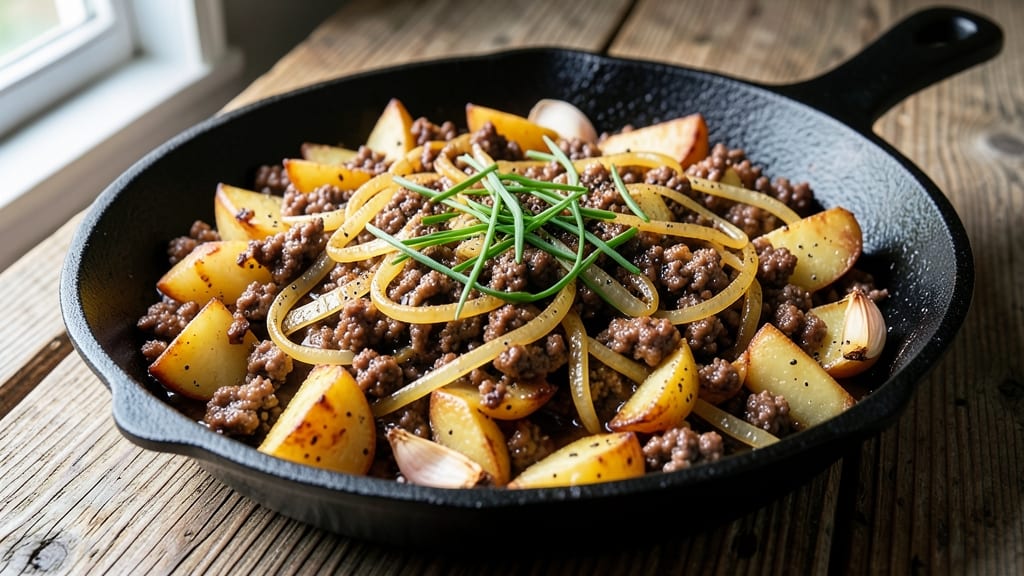
This ground beef and potato hash recipe delivers crispy, golden layers of pan-fried potatoes and savory beef crumbles that taste like a home-cooked restaurant dish. 🔥 The secret lies in high-heat searing—potatoes develop that perfect caramelized crust while the beef browns into flavorful crumbles that cling to every bite.
I perfected this method after years of experimenting with textures, and it never fails to impress even picky eaters.
What sets this hash apart is the balance of technique and simplicity. You'll dice potatoes into uniform pieces for even cooking, then layer them in a skillet with onions and beef for maximum crispiness. Medium-high heat is critical—it creates those coveted caramelized edges while keeping the centers tender.
The result? A dish that's hearty enough for breakfast but versatile enough for dinner, with each bite offering a satisfying mix of textures.
By the time you serve this hash, you'll have a skillet full of crispy potatoes with tender centers, perfectly browned beef crumbles, and onions that add sweet depth. The aroma alone will have everyone gathering around the table, and the first forkful delivers on that restaurant-quality promise.
Serve it as-is or top with a fried egg for extra richness—this is comfort food at its finest.
This recipe scales beautifully for feeding a crowd or meal prepping for the week. The flavors only develop more as it sits, making it perfect for make-ahead dinners. Let's get started on creating this satisfying, crispy hash that brings home-cooked warmth to any meal.
Ingredients for ground beef potato hash
Crispy potatoes, savory beef, and aromatic onions—just 11 ingredients for restaurant-quality hash.
| Ingredient | Amount | Notes |
|---|---|---|
| Russet Potatoes 🥔 | 2 ½ lb | Diced into 1/2-inch cubes |
| Ground Beef 🥩 | 1 lb | 80/20 fat ratio preferred |
| Yellow Onions 🧅 | 1 whole | Diced small, about 1 cup |
| Kosher Salt 🧂 | 1 ½ tsp | Diamond Crystal preferred |
| Black Pepper 🌶️ | ½ tsp | Freshly ground for best flavor |
| Garlic Cloves 🧄 | 3 cloves | Minced fine for depth |
| Olive Oil 🫒 | ½ cup | High smoke point for searing |
| Butter 🧈 | 2 tbsp | Unsalted, for richness |
| Fresh Parsley 🌿 | ¼ cup | Chopped for garnish |
| Paprika 🌶️ | ½ tsp | Smoked for color and depth |
| Bay Leaves 🌿 | 1 whole | Optional for aromatic depth |
The potatoes are the star here. Russets hold their shape best, but Yukon Golds add creaminess if you prefer. Walmart or Costco usually have them pre-washed and bagged, which saves time. Dice them uniformly—about 1/2-inch cubes—so they cook evenly. The beef should be 80/20 fat ratio for juiciness; Kroger or local butchers often carry it pre-ground. Fresh parsley from the grocery store's produce section adds brightness, but dried works in a pinch if you're short on time.
No yellow onions? Red or white onions work fine—they just add a slightly different sweetness profile. Skipping the garlic? Garlic powder at half the amount gives you a milder flavor. The olive oil is non-negotiable for high-heat searing—avoid flavored oils like garlic-infused. If you're making this for a crowd, double the butter—it's worth the extra richness. The bay leaves are optional but add subtle depth; if you omit them, just increase the paprika to 1 teaspoon for color.
This hash reheats beautifully—3-5 minutes in a skillet over medium heat revives the crispiness. Store leftovers in an airtight container for 4-5 days in the fridge, or freeze for up to 3 months. For meal prep, portion into containers with a layer of parchment paper between servings to maintain texture. The flavors actually improve overnight as everything melds together—perfect for make-ahead dinners.
Why You'll Love This Recipe
- One-Pan Magic: I swear by this recipe when I’m too tired to dirty more than one pan. Dice those Russets, brown the beef, and toss everything together—no flipping, no fuss. The onions caramelize right in the pan while the potatoes crisp up, and suddenly, dinner’s on the table.
- Savory Crunch Perfection: That golden crust on the potatoes? It’s the real star. The beef stays juicy while the onions mellow into sweetness, and a sprinkle of black pepper ties it all together. It’s hearty enough to stand alone but still feels like a hug in a bowl.
- Lunchbox Hero: Between us, this hash is my secret weapon for meal prep. Pack it cold for lunch—it reheats like a dream—and the flavors only get better the next day. My kids (and my wallet) thank me every time I send it in their thermoses.
- Budget Breakthrough: A pound of beef, a few potatoes, and an onion? This feeds four for under $10. No fancy ingredients, no waste—just pure, satisfying comfort food. Honestly, it’s the kind of recipe that makes me feel like I’m feeding a crowd without breaking the bank.
Step-by-step instructions for crispy ground beef and potato hash
Here's how to build layers of golden potatoes and savory beef for maximum texture contrast.
🍳 Step 1: Par-Cook the Potatoes for Perfect Texture
Place the 2.5 lb Russet Potatoes in a large pot and cover with cold water by about 2 inches. Add 1 tsp of the 1.5 tsp Kosher Salt and bring to a boil over high heat. Once boiling, reduce to medium-high heat and cook for 8-10 minutes until the potatoes are fork-tender but still firm when pierced.
Drain immediately and transfer to a colander to steam-dry for 2 minutes. This partial cooking ensures your hash cooks quickly in the pan while maintaining crispy edges. Overcooking here leads to mushy potatoes—test with a fork for resistance. While they're draining, dice the 1 whole Yellow Onions into small pieces (about 1 cup) and mince the 3 cloves Garlic Cloves finely.
🔥 Step 2: Build Crispy Potato Layers in the Pan
Heat 2 tablespoons of the 0.5 cup Olive Oil in a large, heavy skillet over medium-high heat until shimmering. Add half of the par-cooked potatoes in a single layer, pressing down gently with a spatula. Cook undisturbed for 8-10 minutes until the bottom layer is deep golden brown and crispy.
Flip the entire layer carefully using a spatula, then add the remaining potatoes. Cook another 8-10 minutes until both layers are crispy and the potatoes release easily from the pan. Real talk: this is where the magic happens—those crispy layers are what makes hash special. If they're not golden, they're not done. Don't rush this step.
🍳 Step 3: Cook the Beef and Aromatics
Push the potatoes to one side of the skillet and add the remaining 3 tablespoons Olive Oil and 2 tbsp Butter to the empty space. Add the 1 lb Ground Beef and cook over medium-high heat until browned and crumbly (5-6 minutes). Drain excess fat if needed, leaving about 1 tablespoon in the pan.
Add the diced Yellow Onions and minced Garlic Cloves, stirring to combine. Cook for 3-4 minutes until the onions soften and the garlic becomes fragrant. Sprinkle with 0.5 tsp Paprika and 0.5 tsp Black Pepper, stirring to coat the beef mixture evenly. Add the 1 whole Bay Leaves (if using) for subtle depth.
🥘 Step 4: Combine and Finish with Butter
Return the potatoes to the skillet and stir gently to combine with the beef mixture. Cook for another 3-4 minutes just to heat through and meld flavors. Remove from heat and stir in the 2 tbsp Butter for richness. Taste and adjust seasoning with the remaining 0.5 tsp Kosher Salt if needed.
Here's the thing—hash tastes best when served immediately while still crispy. Garnish with chopped 0.25 cup Fresh Parsley right before serving. The parsley adds freshness that cuts through the richness of the beef and butter. Serve with fried eggs on top for a classic breakfast hash or alongside avocado slices for a brunch twist.
Pro Tips For Making Ground Beef Potato Hash
- CRISP THE POTATOES FIRST: I used to toss raw potatoes into the pan with everything else, and they’d steam instead of brown. Instead, slice the Russets into ¼-inch rounds, spread them on a baking sheet, and bake at 425°F (220°C) for 20 minutes before cooking. This jumpstarts the crisping—no soggy edges here.
- BREAK THE BEEF BY HAND: Skip the food processor—it turns ground beef into paste. Use your fingers to break it into rough, uneven chunks (about ½-inch pieces). This creates more surface area for browning, so you get better flavor and texture. (Yes, it’s messy, but worth it.)
- SWEAT THE ONIONS LOW: High heat caramelizes onions too fast, making them bitter. Cook them on medium-low with a pinch of salt until fully translucent—about 8 minutes. This softens them properly before the beef joins, so they don’t turn to mush later.
- SALT THE POTATOES BEFORE COOKING: Toss the sliced potatoes with ½ teaspoon kosher salt before baking or pan-frying. It seasons the edges while they crisp, and the salt draws out just enough moisture to help them brown. (I learned this the hard way—dry, bland hash is no fun.)
Creative variations of these flavors
Breakfast-to-Dinner Twist
Turn this hash into a brunch star by topping individual portions with 2 sunny-side-up eggs cooked in the same skillet after removing the hash. The runny yolks create a luscious contrast to the crispy potatoes.
For extra decadence, add ¼ cup shredded sharp cheddar on top and let it melt slightly. 🍳
For dinner, swap the eggs for avocado slices and sour cream drizzle. The creamy avocado balances the savory beef, while a dollop of sour cream adds richness. I love serving this with a side of crispy hash browns for a full breakfast-for-dinner experience.
Spicy Southwest Hash
Add 1 tbsp chipotle powder and ½ tsp cayenne pepper when cooking the beef for a smoky kick. Stir in ½ cup black beans (rinsed and drained) along with the onions for extra fiber. Top with ¼ cup crumbled cotija cheese and 2 tbsp chopped cilantro before serving. 🌶️
For a vegetarian-friendly version, replace the beef with 1 lb crumbled chorizo (or 1 cup lentils for a plant-based option). The chorizo adds smokiness without needing extra spices, while lentils soak up the flavors beautifully.
Cheesy Potato Hash
Sprinkle 1 cup shredded Gruyère or cheddar cheese over the potatoes in the final 2 minutes of cooking. The cheese melts into a golden blanket, adding incredible depth. For extra gooeyness, stir in 2 tbsp cream cheese with the butter at the end. 🧀
For a baked version, transfer the hash to a 9x13-inch baking dish, top with cheese, and broil for 3-4 minutes until bubbly. This works great for feeding a crowd or meal prepping—just reheat covered in the oven at 350°F for 15 minutes.
Herb-Infused Variations
Swap the parsley garnish for 2 tbsp chopped chives or 1 tbsp fresh dill for a bright, herbaceous finish. Add 1 tsp dried thyme or 1 sprig fresh rosemary (removed before serving) when cooking the beef for an earthy aroma.
These herbs pair especially well with Gruyère cheese in the cheesy variation. 🌿
For a Mediterranean twist, add ½ cup chopped kalamata olives and 2 tbsp capers with the onions. Finish with a squeeze of lemon juice and extra black pepper for a zesty, briny flavor profile that works beautifully as a side dish.
Nutrition facts
Frequently asked questions
Can I use sweet potatoes instead of Russets?
Yes, but expect a different texture! Sweet potatoes will be softer and slightly sweeter, which works well if you prefer a more moist hash. For best results, reduce the cooking time by 2-3 minutes during the par-cook step since sweet potatoes soften faster. The crispiness will be less pronounced, but the flavor will be richer and caramelized.
Why does my hash turn out soggy?
Soggy hash usually means one of two things: overcrowding the pan or undercooking the potatoes first. Always cook potatoes in batches over medium-high heat with plenty of space between pieces. Also, ensure they're fork-tender but still firm after the initial boil—8-10 minutes is key. If using a nonstick pan, reduce oil slightly to prevent steam buildup.
What's the best way to reheat leftovers?
Reheat in a skillet over medium heat for 3-5 minutes, stirring occasionally, until crispy again. Add a splash of water or butter to help restore crispiness. For oven reheating, spread hash on a baking sheet at 400°F for 10-12 minutes, adding a sprinkle of water or butter halfway through. Microwaving works in a pinch, but texture suffers—it's not ideal for crispiness.
Can I make this hash ahead of time?
This hash actually tastes better the next day as flavors meld. Store in an airtight container for 4-5 days in the fridge. For meal prep, portion into containers with parchment paper between layers to maintain crispiness. Reheat as directed above—just add 1-2 extra minutes to restore texture when reheating.
What's the secret to extra crispy potatoes?
The secret is patience and heat control! Cook potatoes in batches over medium-high heat until golden brown on the bottom before flipping. Use a heavy skillet (cast iron works best) and avoid moving them too soon. The initial par-cook should leave potatoes firm but fork-tender—this ensures they crisp up beautifully in the pan without turning mushy.