
Side Dishes
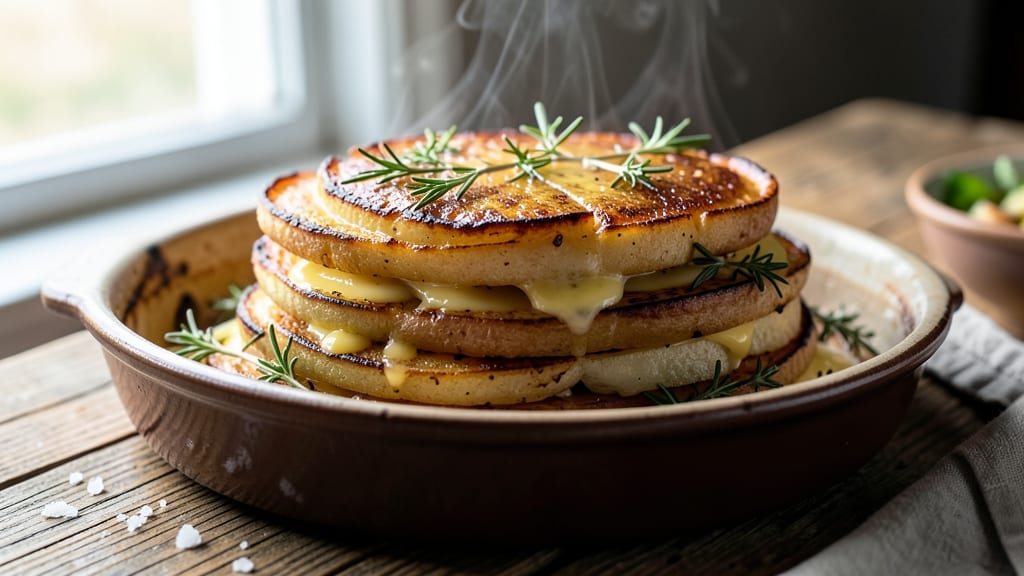
This baked layered potato recipe transforms humble russets into a restaurant-worthy side with a crispy golden crust and creamy, fluffy interior—no fancy techniques required. The secret lies in thinly slicing potatoes and layering them with butter, salt, and herbs, then baking until caramelized perfection.
I’ve perfected this method over years of holiday dinners, where it disappears faster than mashed potatoes at Thanksgiving.
What makes this recipe foolproof is the balance of texture and flavor: the outer layers develop a satisfying crunch while the center stays tender. You’ll need just 5 simple ingredients and 45 minutes of hands-off baking time—ideal for busy weeknights or holiday feasts.
The key is patience during layering (no skipping this step!) and using a sharp knife for even slices.
By the time it emerges from the oven, you’ll have a dish that’s visually stunning with its golden, caramelized edges and creamy layers underneath. The aroma alone will have everyone gathering around the table.
This recipe scales effortlessly—double or halve it for any gathering size—and customizes beautifully with add-ins like cheese, bacon, or fresh herbs.
The best part? Leftovers reheat perfectly, making this a meal-prep favorite. Whether serving alongside roasted meats or as a hearty vegetarian main, this baked potato masterpiece delivers restaurant-quality results without the fuss. Let’s get started with the step-by-step guide below.
Ingredients for baked layered potato
Five ingredients create restaurant-worthy texture and flavor without advanced techniques.
| Ingredient | Amount | Notes |
|---|---|---|
| Russet Potatoes 🥔 | 2 lb | Thinly sliced, uniform thickness |
| Unsalted Butter 🧈 | ½ cup | Cold, cubed for even distribution |
| Kosher Salt 🧂 | 1 ½ tsp | Diamond Crystal preferred |
| Fresh Rosemary 🌿 | ¼ cup | Finely chopped, stems removed |
| Fresh Thyme 🌿 | ⅛ cup | Leaves only, finely chopped |
The russet potatoes are non-negotiable here—their high starch content ensures that crispy crust. Look for firm, unblemished russets with smooth skin, ideally from local farms or specialty stores like Whole Foods or Harris Teeter. Avoid potatoes with sprouts or soft spots, as they won’t slice evenly. For the best results, use a mandoline slicer to achieve uniform thickness—about 1/8-inch slices work perfectly. If you don’t have one, a sharp chef’s knife and steady hand will do. The key is consistency: even slices ensure even cooking and that coveted caramelized crust.
No fresh rosemary? Dried rosemary at one-third the amount will work in a pinch, though fresh offers a brighter, more vibrant flavor. The butter should be cold and cubed—this prevents it from melting too quickly during layering. For extra richness, consider swapping in brown butter instead of regular butter. The herbs can be adjusted to taste: if you prefer a more pronounced herbal note, increase the thyme slightly. For those who love cheese, adding sharp cheddar or Gruyère between layers takes this dish to the next level—just be sure to use about 1 cup shredded, distributed evenly.
Layered potatoes keep best when refrigerated in an airtight container for up to 3 days, though they’re at their peak the day they’re made. For longer storage, freeze them in a single layer before transferring to a freezer bag—this prevents a solid block. Reheat from frozen in the oven at 400°F for 20-25 minutes until the edges are crispy again. The butter will solidify slightly after baking, so let it sit at room temperature for 5-10 minutes before serving to restore its creamy texture. This dish reheats beautifully, making it ideal for meal prep—just plan to crisp the top layer again in the oven.
Why You'll Love This Recipe
- One-Pan Magic: I swear by this for nights when I’d rather not wash a million dishes. Slice those Russets, layer them with butter and herbs, and let the oven do the work—no pots, no pans, just golden perfection waiting for you.
- Herb-Packed Punch: That rosemary and thyme? They turn simple potatoes into something ridiculously good. The crispy edges and buttery layers make every bite feel like a little flavor celebration—no fancy ingredients, just pure satisfaction.
- Meal Prep Savior: Between us, this is my go-to for lunches all week. Bake a big tray, slice it up, and you’ve got hearty, filling portions that taste fresh even after three days. (Yes, even on a Tuesday night.)
- Budget-Friendly Luxury: Russets and butter are cheap, but they taste like a fancy dinner. I make this for family dinners, potlucks, or just because—it’s filling, impressive, and won’t break the bank. Leftovers? Even better.
Step-by-step instructions for baked layered potato recipe
Mastering this technique guarantees a restaurant-quality dish with perfect texture contrasts.
Prepare the Potatoes for Perfect Slicing
Begin by thoroughly washing the 2 lb russet potatoes under cold water to remove any dirt or debris. Using a sharp mandoline slicer or chef's knife, slice the potatoes into ⅛-inch thick rounds, maintaining uniform thickness for even baking. I find the mandoline gives the most consistent results, but if you're slicing by hand, work on a damp cutting board to prevent slipping.
As you slice, arrange the rounds on paper towels to absorb excess moisture. This step is crucial—wet potatoes steam instead of crisping during baking. Let them sit for 10-15 minutes while you prepare the herbs. You'll know they're ready when the paper towels beneath them are completely dry to the touch.
Season and Layer the Potatoes
In a large bowl, combine the 0.25 cup finely chopped fresh rosemary and 0.125 cup finely chopped fresh thyme with the 1.5 tsp kosher salt. This herb-salt mixture will infuse every layer with flavor. Toss the potato slices gently but thoroughly to coat each piece evenly without tearing them.
In a 9x13-inch baking dish, begin layering the potatoes by placing a single layer flat-side down. Arrange them slightly overlapping but not touching at the edges—this creates space for the butter to melt and crisp the edges. Repeat this process until all potatoes are layered, ending with the flat sides facing up in the final layer. This orientation ensures maximum crispiness on the top and bottom surfaces.
Distribute Butter and Initial Baking
Scatter the 0.5 cup cold cubed unsalted butter evenly over the top layer of potatoes, pressing down gently to help the cubes nestle between the slices. The cold butter will melt gradually during baking, creating steam that transforms the interior into tender, creamy layers while the exterior crisps beautifully.
Cover the baking dish tightly with aluminum foil and bake at 375°F for 45 minutes. This initial baking phase allows the potatoes to soften without browning. Check for doneness by gently pressing a potato slice—it should yield slightly but still hold its shape. If using an instant-read thermometer, the internal temperature should reach 170°F at this stage.
Uncover and Finish for Crispy Perfection
Remove the foil and increase the oven temperature to 425°F. Return the dish to the oven and bake uncovered for 20-25 minutes until the top layer is deep golden brown and the edges are crispy. You'll notice the potatoes begin to pull away slightly from the edges of the baking dish—this is your visual cue that they're developing that perfect crust.
For the final touch, broil on high for 1-2 minutes to intensify the browning. Watch closely to prevent burning—you want that beautiful caramelized color, not charred spots. The potatoes should be fork-tender with a crisp exterior that gives way to creamy, fluffy layers when cut into.
Rest and Serve with Confidence
Let the baked potatoes rest for 10 minutes before serving. This resting period allows the residual heat to finish cooking the center while preventing the butter from pooling at the bottom. The contrast between the crispy exterior and creamy interior will be at its peak during this time.
Slice into perfect squares and serve immediately. Each bite should deliver that satisfying crunch followed by the tender, buttery potato. The herb infusion will linger on your palate, creating a harmonious balance of textures and flavors that make this dish truly exceptional.
Pro Tips For Making Baked Layered Potato
- Slice Thinly, Evenly: Russets are forgiving, but don’t go wild with the knife—aim for ¼-inch slices, not ⅛ or ½. Thicker layers mean uneven cooking; thinner layers guarantee every bite hits that buttery, fluffy sweet spot. I learned this after pulling out one side of the pan that was still raw while the top was crispy.
- Salt the Butter First: Mix ½ teaspoon kosher salt per ¼ cup butter before layering—it dissolves evenly instead of clumping. Fresh herbs (rosemary/thyme) need that salt to brighten, and you’ll taste it better than sprinkling later. (Yes, even if you’re using unsalted butter, trust me on this.)
- Don’t Skip the Rest: After baking, cover with foil and let sit 5-10 minutes before serving. The residual heat finishes cooking the layers while the butter redistributes. I used to cut into it too soon—now I swear by this step for that perfect creamy texture.
- Upgrade with Garlic: Crush 3-4 garlic cloves into the butter before layering—it’s the only time I’ll let raw garlic shine in potatoes. The heat mellows it out, and the aroma cuts through the richness. (No fresh garlic? A pinch of garlic powder works, but it’s not the same.)
Regional styles of this recipe
Classic American Style
This is the version I grew up with—simple, hearty, and perfect for family gatherings. The key is using thick-cut russet potatoes (about ¼-inch slices) layered with melted butter, kosher salt, and fresh rosemary.
I like to add a sprinkle of crushed black pepper between layers for a subtle kick. The beauty of this style is its versatility: it pairs beautifully with roasted turkey or smoked brisket for holiday meals. 🥔
French Potato Gratin
For a more decadent twist, transform this into a potato gratin by adding heavy cream and Gruyère cheese between layers. Start with ½ cup heavy cream mixed with 1 cup shredded Gruyère and 1 tsp Dijon mustard, then layer it between potato slices.
Finish with a final layer of cheese and bake until bubbly and golden. This French-inspired version feels luxurious but still keeps the same hands-off baking method. 🧀
German Kartoffelpuffer Style
In Germany, they take layered potatoes to the next level with Kartoffelpuffer-inspired layers. After slicing the potatoes, grate them instead of slicing them thinly, then mix with 1 egg, ¼ cup flour, and ½ tsp nutmeg.
Press into a baking dish, then layer with sautéed onions and crispy bacon bits. Bake until golden and crispy—this version has a pancake-like texture that’s addictive. 🇩🇪
Spanish Tortilla Adaptation
For a Spanish-inspired take, add potato tortilla elements by layering thinly sliced potatoes with caramelized onions and egg wash. After baking, brush the top with a mixture of 2 beaten eggs and 2 tbsp milk, then broil until set.
This creates a creamy, custard-like center with crispy edges—perfect for tapas or a vegetarian main. 🍳
Southern U.S. Cheesy Hash
In the American South, this dish often becomes a cheesy hash with additions like crumbled bacon, sharp cheddar, and a dash of hot sauce. After layering the potatoes, sprinkle ½ cup shredded cheddar and ¼ cup cooked bacon between layers.
Top with a final layer of cheese and bake until bubbly. Serve with a side of sour cream for dipping—this version is a crowd-pleaser at BBQs. 🔥
Nutrition facts
Frequently asked questions
Can I use sweet potatoes instead of russets?
Sweet potatoes work but require adjustments for best results. Their natural moisture means you should slice them slightly thicker (¼-inch) and pat them very dry before layering. Reduce baking time by 10-15 minutes since they cook faster, and add an extra 2 tablespoons butter to compensate for their lower fat content. The flavor will be sweeter and more caramelized.
How do I prevent soggy layers?
The key is thorough drying and proper layering. After slicing, let potatoes air-dry on paper towels for 15-20 minutes—this removes excess moisture that causes steaming. Use cold butter (not melted) so it creates steam during baking, and never overcrowd layers. If using cheese or other add-ins, sprinkle them between dry potato layers only.
Can I make this ahead of time?
Assemble the dish up to 24 hours ahead and refrigerate uncovered (this helps dry the potatoes). Bake straight from the fridge, adding 10-15 minutes to the initial covered baking time. For longer storage, freeze the assembled (unbaked) dish for up to 1 month, then bake from frozen with an extra 20 minutes covered time.
What's the best way to reheat leftovers?
For crispy results, place leftovers in a 400°F oven for 15-20 minutes covered, then 5-10 minutes uncovered to restore the crust. Microwave reheating works but creates a rubbery texture—avoid it. For extra crispiness, broil for 2-3 minutes at the end, watching closely to prevent burning.
Can I make this in a smaller baking dish?
Yes, but adjust the layer thickness. For a 9x9-inch dish, use 1 lb potatoes sliced ⅛-inch thick and reduce butter to ¼ cup. The key is maintaining the same layer height (about 2 inches) for even cooking. Bake times remain similar, but check for doneness at the 35-minute mark during the uncovered phase.